Our eldest son became interested in LEGO. At first, you can keep everything contained in one box, but soon enough, it takes more time to build/play with it. This means we needed a solution to store projects in progress. If you combine this with a growing collection of sets and boxes, you see this is an impossible situation!
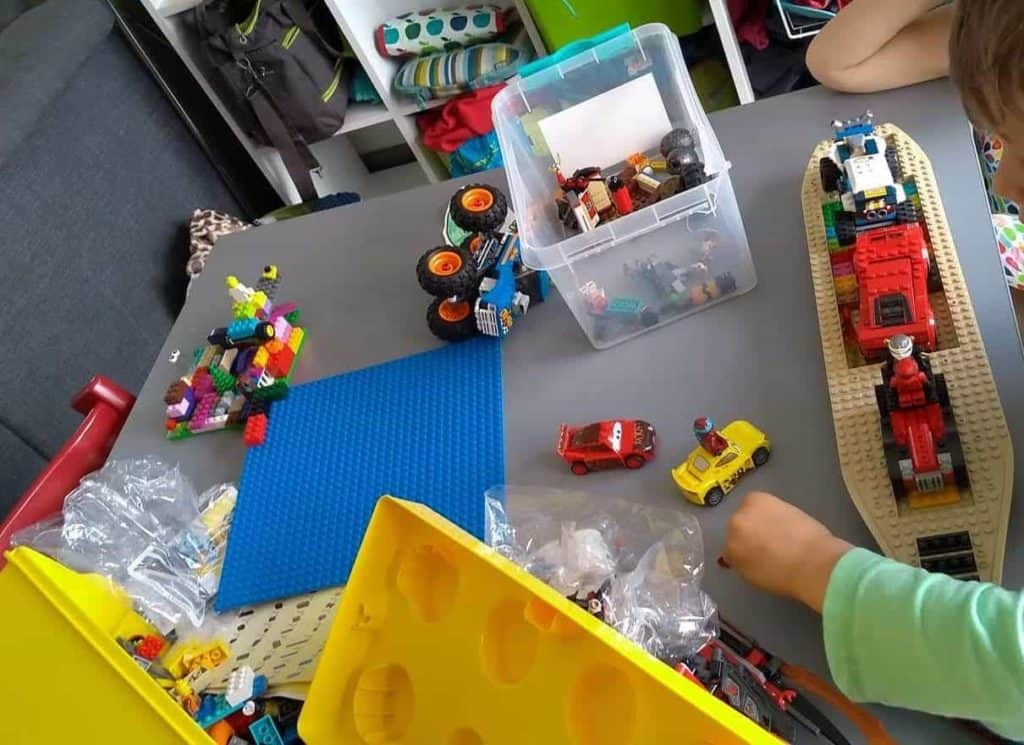
Since this is our dinner table, it needed to be cleared of all pieces for every meal. Our kids wanted to keep playing longer and longer with the LEGO. They started building their cars, boats, houses, … Interrupting their play every time made it harder for all of us (struggle to clean up, stop the play, …).
Solution
My wife reads a few blogs from moms writing about their ideas and experiences. The solution for our LEGO problem was published on “Mama ruimt op” (Dutch). The basic idea is as smart as it is simple! The structure of the table is a group of 6 Trofast wall storage elements with boxes to store all LEGO blocks or K’nex or ….

Why this model?
- Our kids are very … ehm … enthusiastic when they play, which means toys, boxes, … need to be robust.
- The table will be used for some years, by (children from) different ages. So not too high, not too low
- A table to build on is good, a table with additional storage is better
- Low-budget
- Easy to move, so cleaning is easy
Steps to build
Preparations
Material
- 6 Trofast Wall Storage
- 4 Swivel caster wheels with Rubber
- 1 board of 93 x 135 cm (bottom)
- 1 board of 98 x 140 cm with rounded corners (top)
- Linoleum or vinyl with high durability (to cover top)
- A few dozen wood screws
- Double-sided tape
- Trofast storage boxes (a mix of smaller and lager boxes)
Tools
Nothing special is required:
- Cutter knife
- Electrical drill with bits
- Hex key (included in the Ikea products, but I prefer a taller one)
Assemble storage/structure
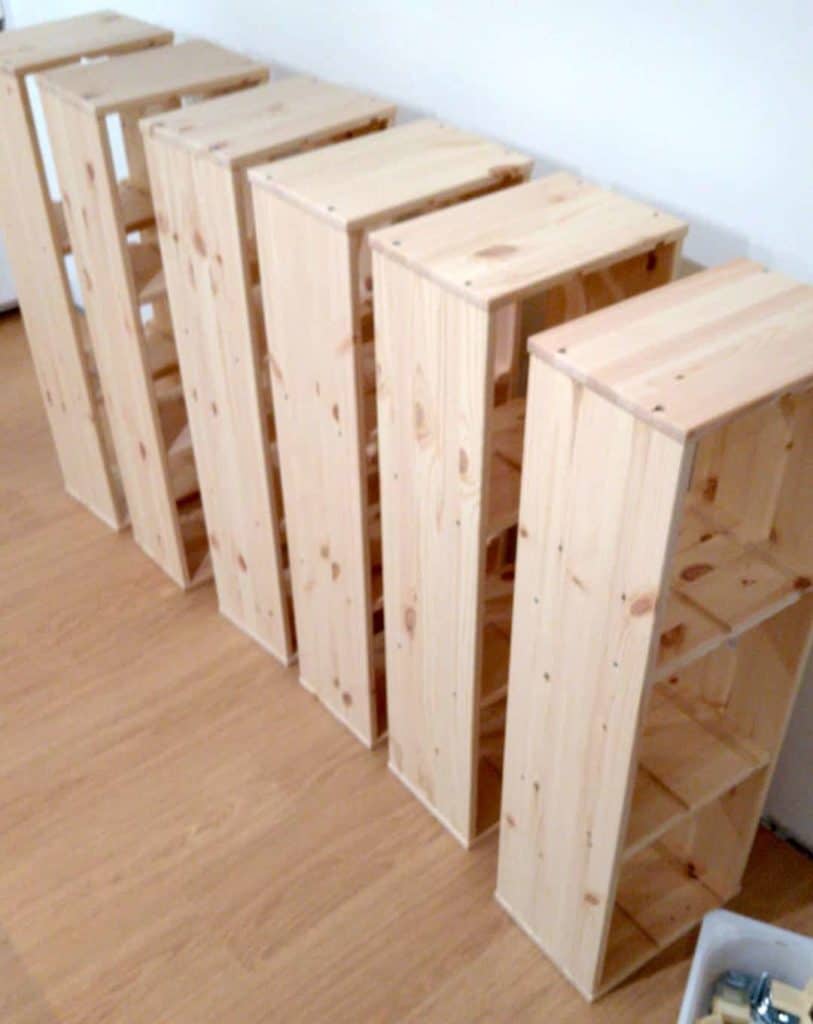
To start, assemble the 6 Trofast elements
Arrange
To optimize storage space, put 2 Trofast elements after one another. This way, the rails are deeper and can support the larger Trofast boxes. The small open space in the middle has no negative impact, don’t worry about it.

Base
The base plate is used to keep the Trofast elements in place. You can use a few planks for this, but we opted for a larger piece of OSB to support the table. Size: 93 x 135 cm. To temporaroly fix the plate in the right position and support the screws, we used double-sided tape. A bunch of screws attach the Trofast elements to the OSB board.
Mobility of the table is mandatory, so we can rearrange the room, clean it from time to time or collect all LEGO pieces from under it. We mounted 4 Swivel caster wheels with Rubber and locks. This way, we can easily move the table and keep it frim in place.
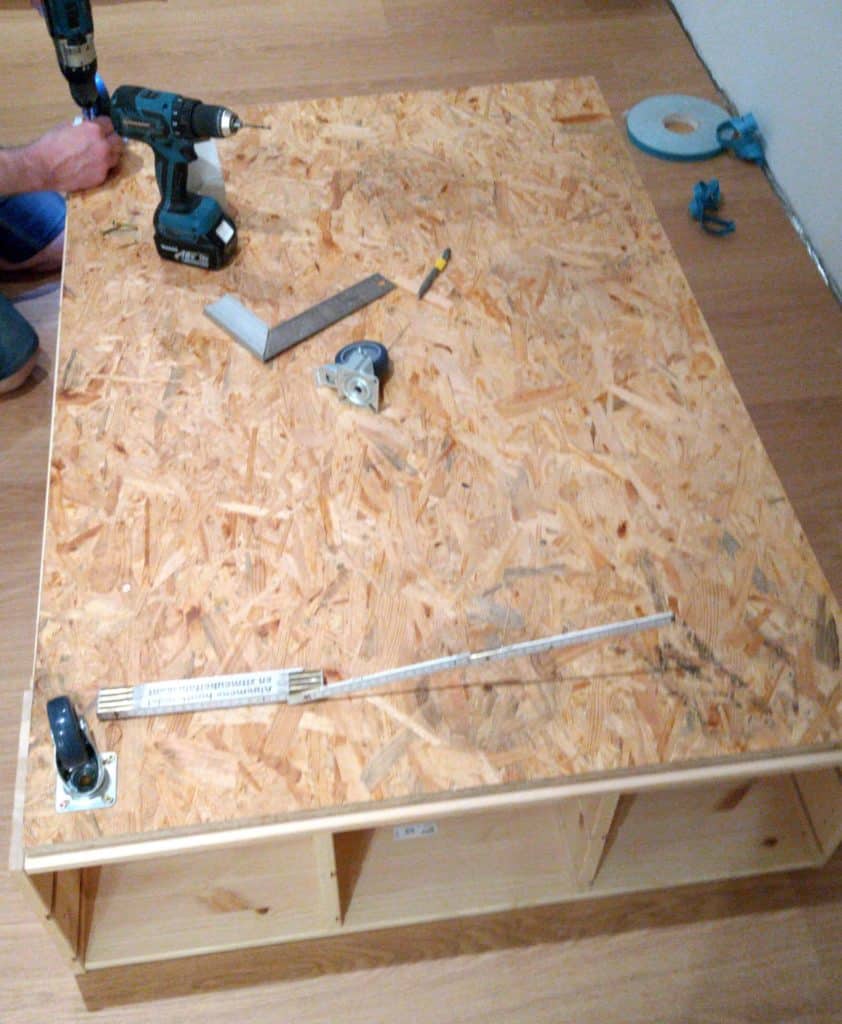
Base plate and wheels 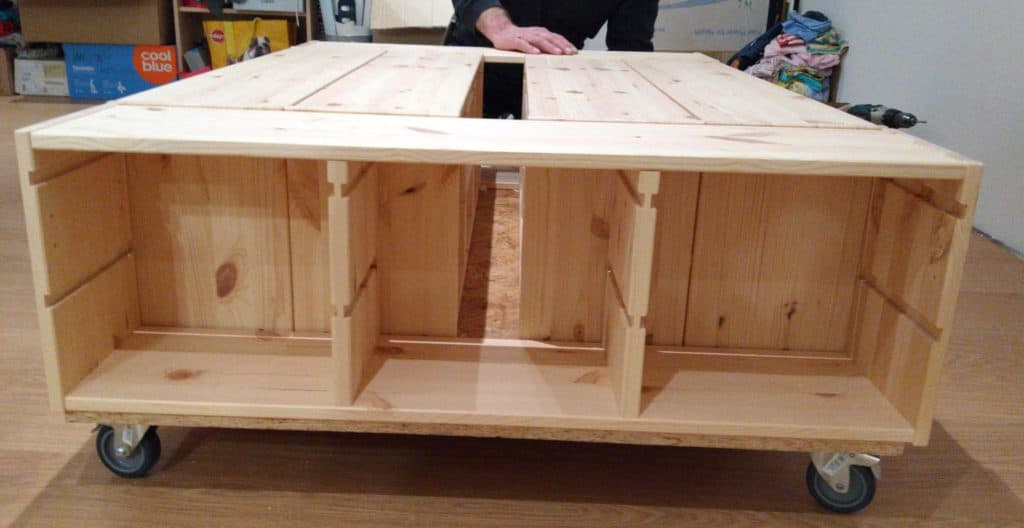
Base is ready
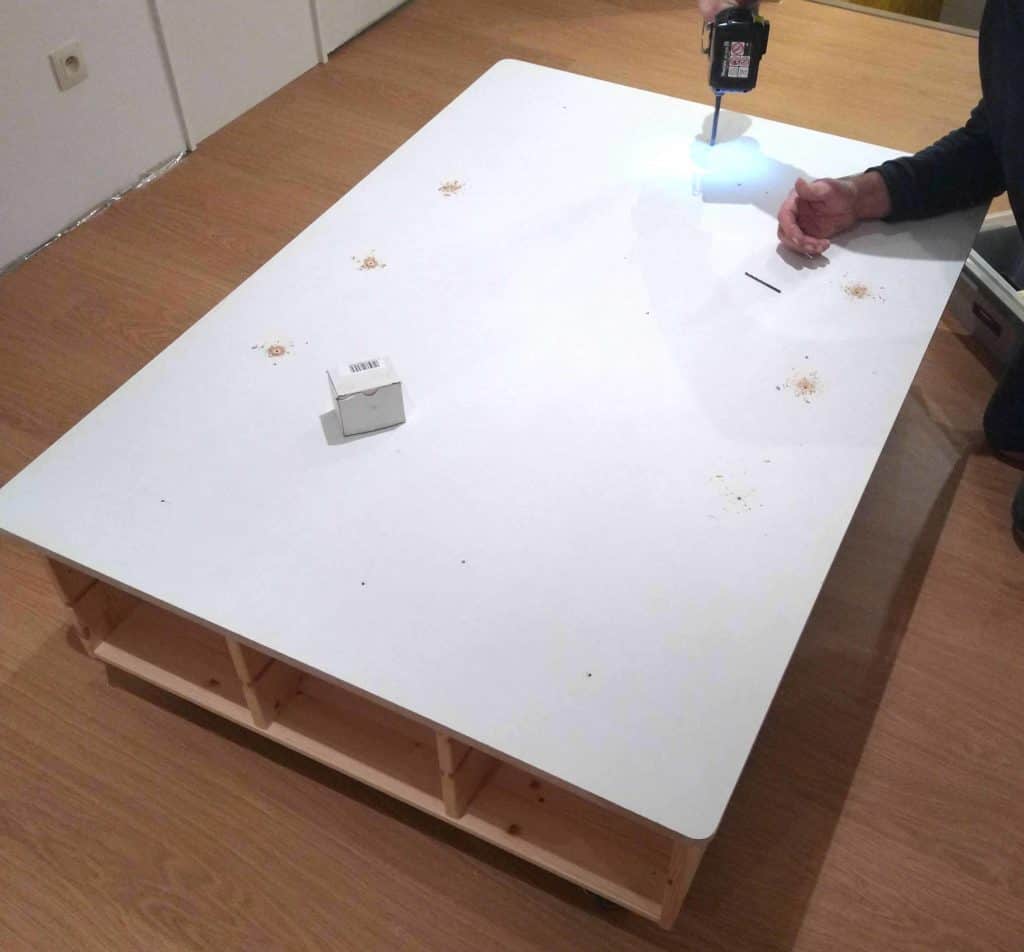
Tabletop
The same way as we did the base plate, we take the top plate (98 x 140 cm). Since the top plate is larger on every side, we rounded the corners, so the kids wouldn’t hurt themselves.
The table can be used in this state, but we can add some small extras to it!
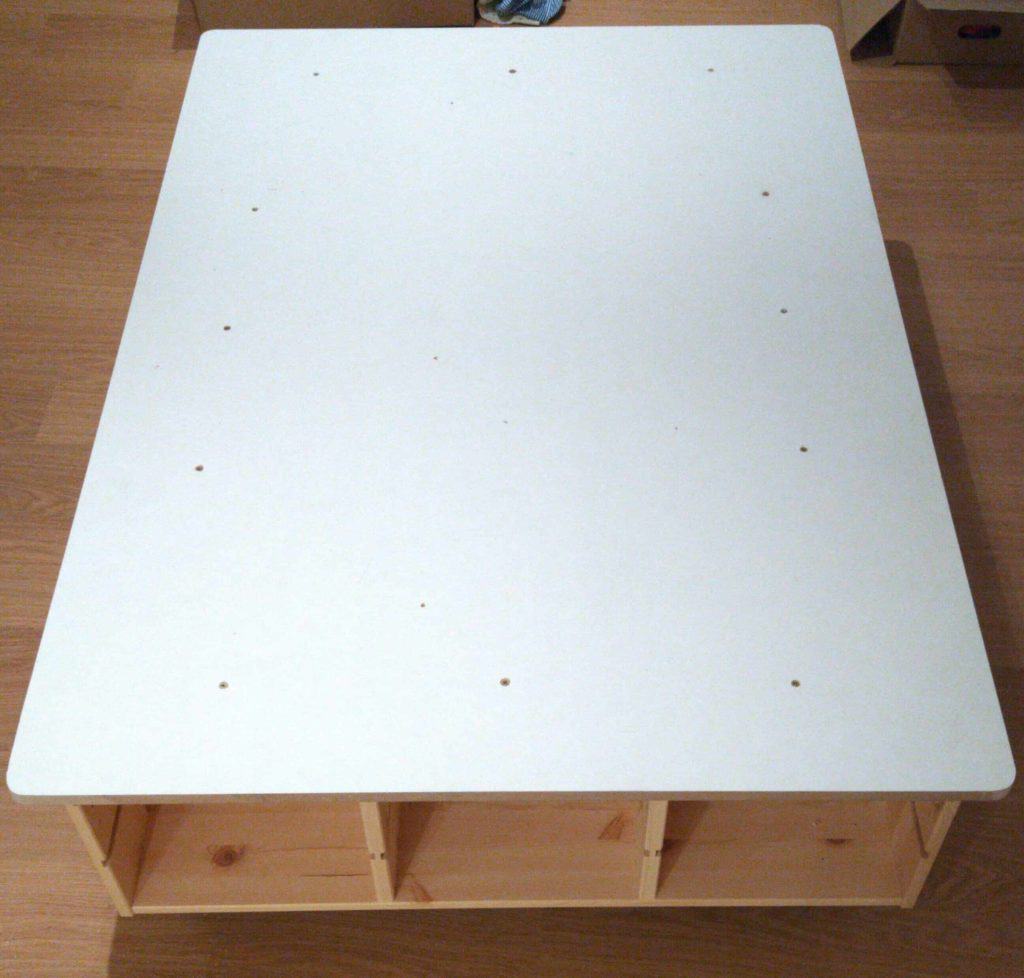
Top/front view 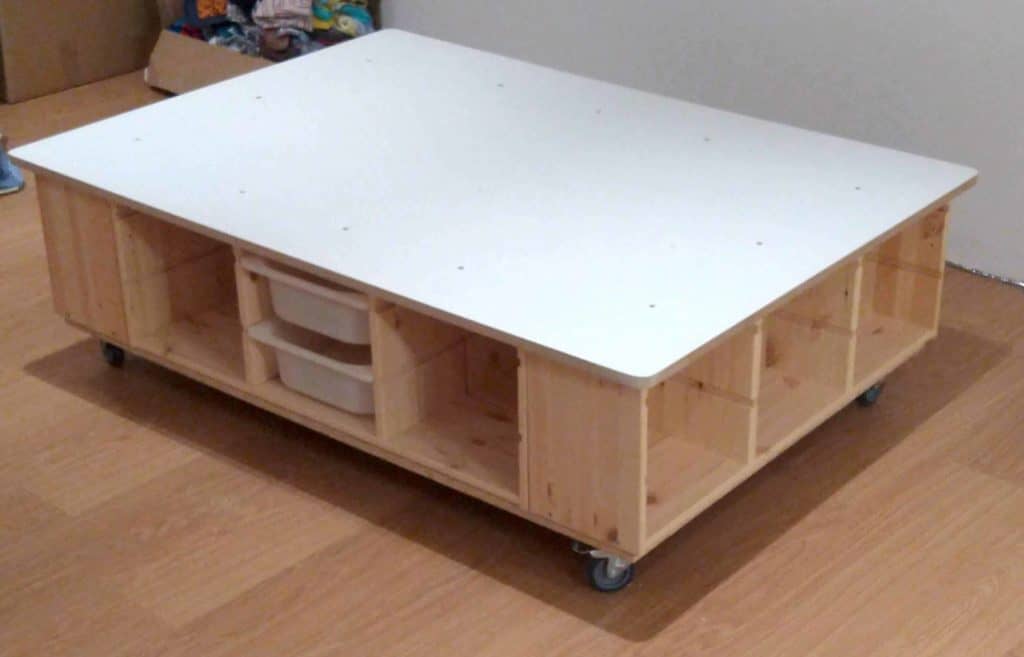
Side view
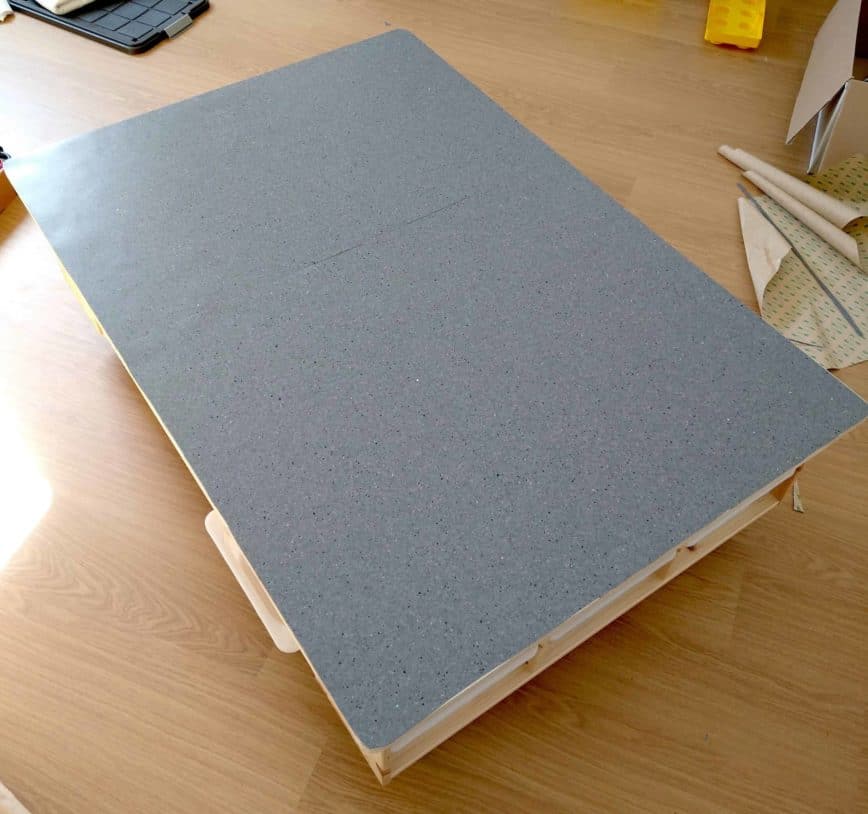
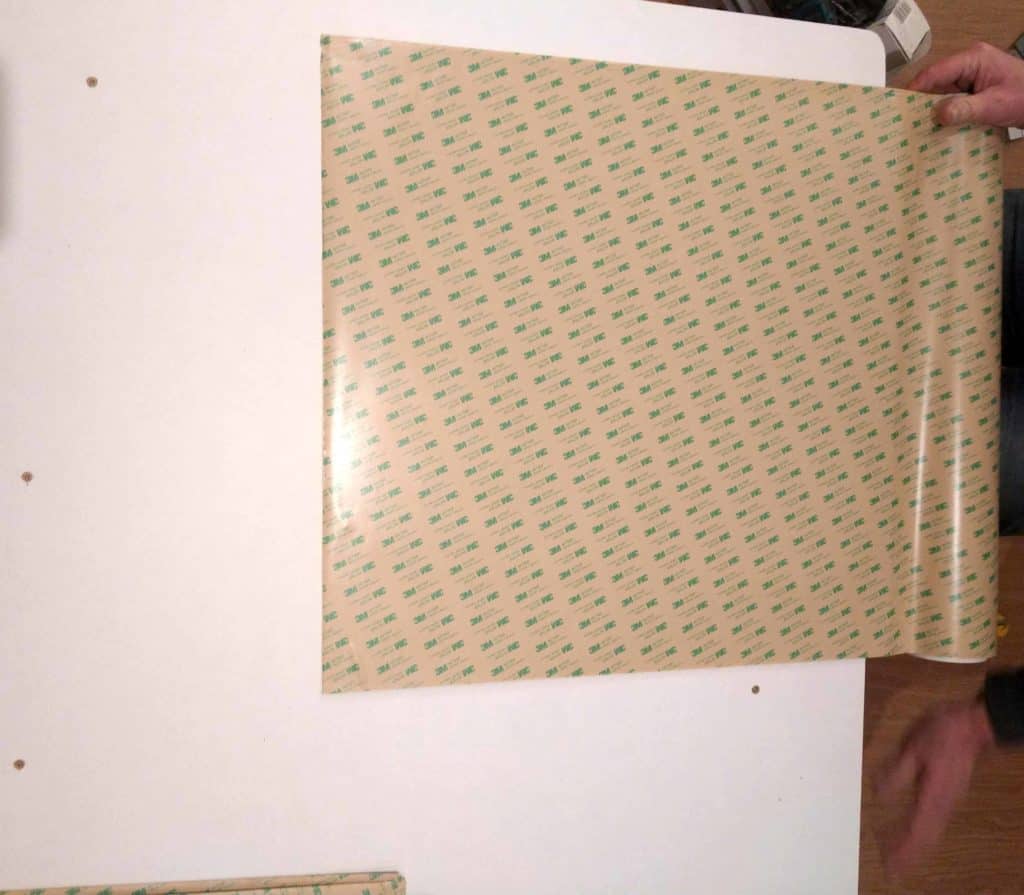
Top layer
To protect the table top and to cover the screw holes, we opted for a few linoleum tiles, which was a left-over from another project. We used double sided tape to glue the tiles to the top plate. This layer adds some friction to the surface and is a little bit softer, so pieces don’t bounce of the surface on the ground so easy.

Conclusion
There are many solutions out there. For our needs, this table, with storage is a great solution. The construction wasn’t that hard and didn’t take much time.